GitDupe - an introduction to Mono.Options


In an era where graphical user interfaces seemingly dominate user experience, the power of a solid command line tool is not to be overlooked. However, bringing such tools to life doesn’t have to be such a pain; Mono.Options is a hidden gem of a tool that makes creating these applications a straight-forward and seamless experience.
So, we are going to explore the features of Mono.Options and put them to use by creating GitDupe: a DIY version of the git command line tool we all know and love.
For the sake of not writing a novel in a single post, the process of creating the CLI tool wil be split up in a few posts:
- Part 1 (this post): Learning about what Mono.Options is and getting the bare bones of application up with a working command
- Part 2: Implementing nested commands with Mono.Options (opens in a new tab)
- Part 3: Refine the CLI tool: take your app from good to great and implement argument validation + logging + custom error codes (Coming soon!)
So, what is Mono.Options?
It is a parsing library in C# and can be accessed as a nuget package.
Some documentation to check out:
To make the most of the article, follow along using the code repo (opens in a new tab)!
Creating the Console Application
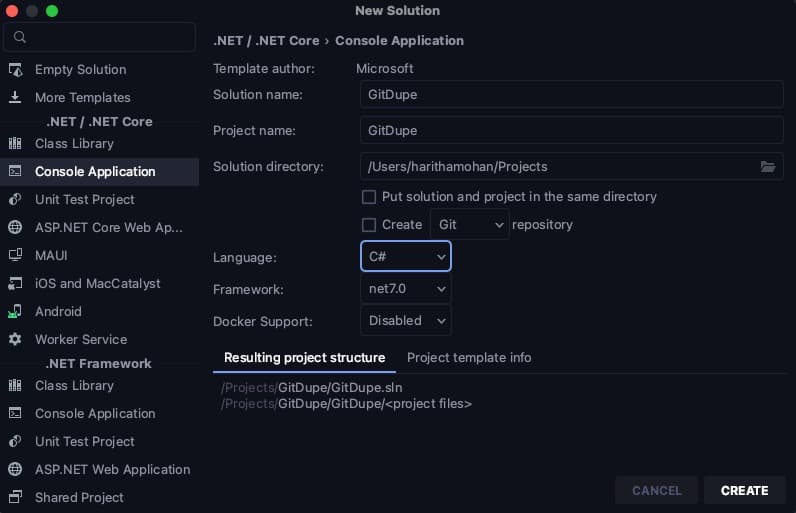
So using your favorite IDE, start off by creating a .NET Console Application.

Upon creation, you will notice there is a Program.cs file- this will be the main entrypoint for our app. In this file, we will establish the class and main method to set the stage for the commands.
At this point, it’s time to add our lovely Mono.options library to our application. In the solution explorer, navigate to Dependencies > Manage NuGet Packages > Search “Mono.Options” > Add (+).


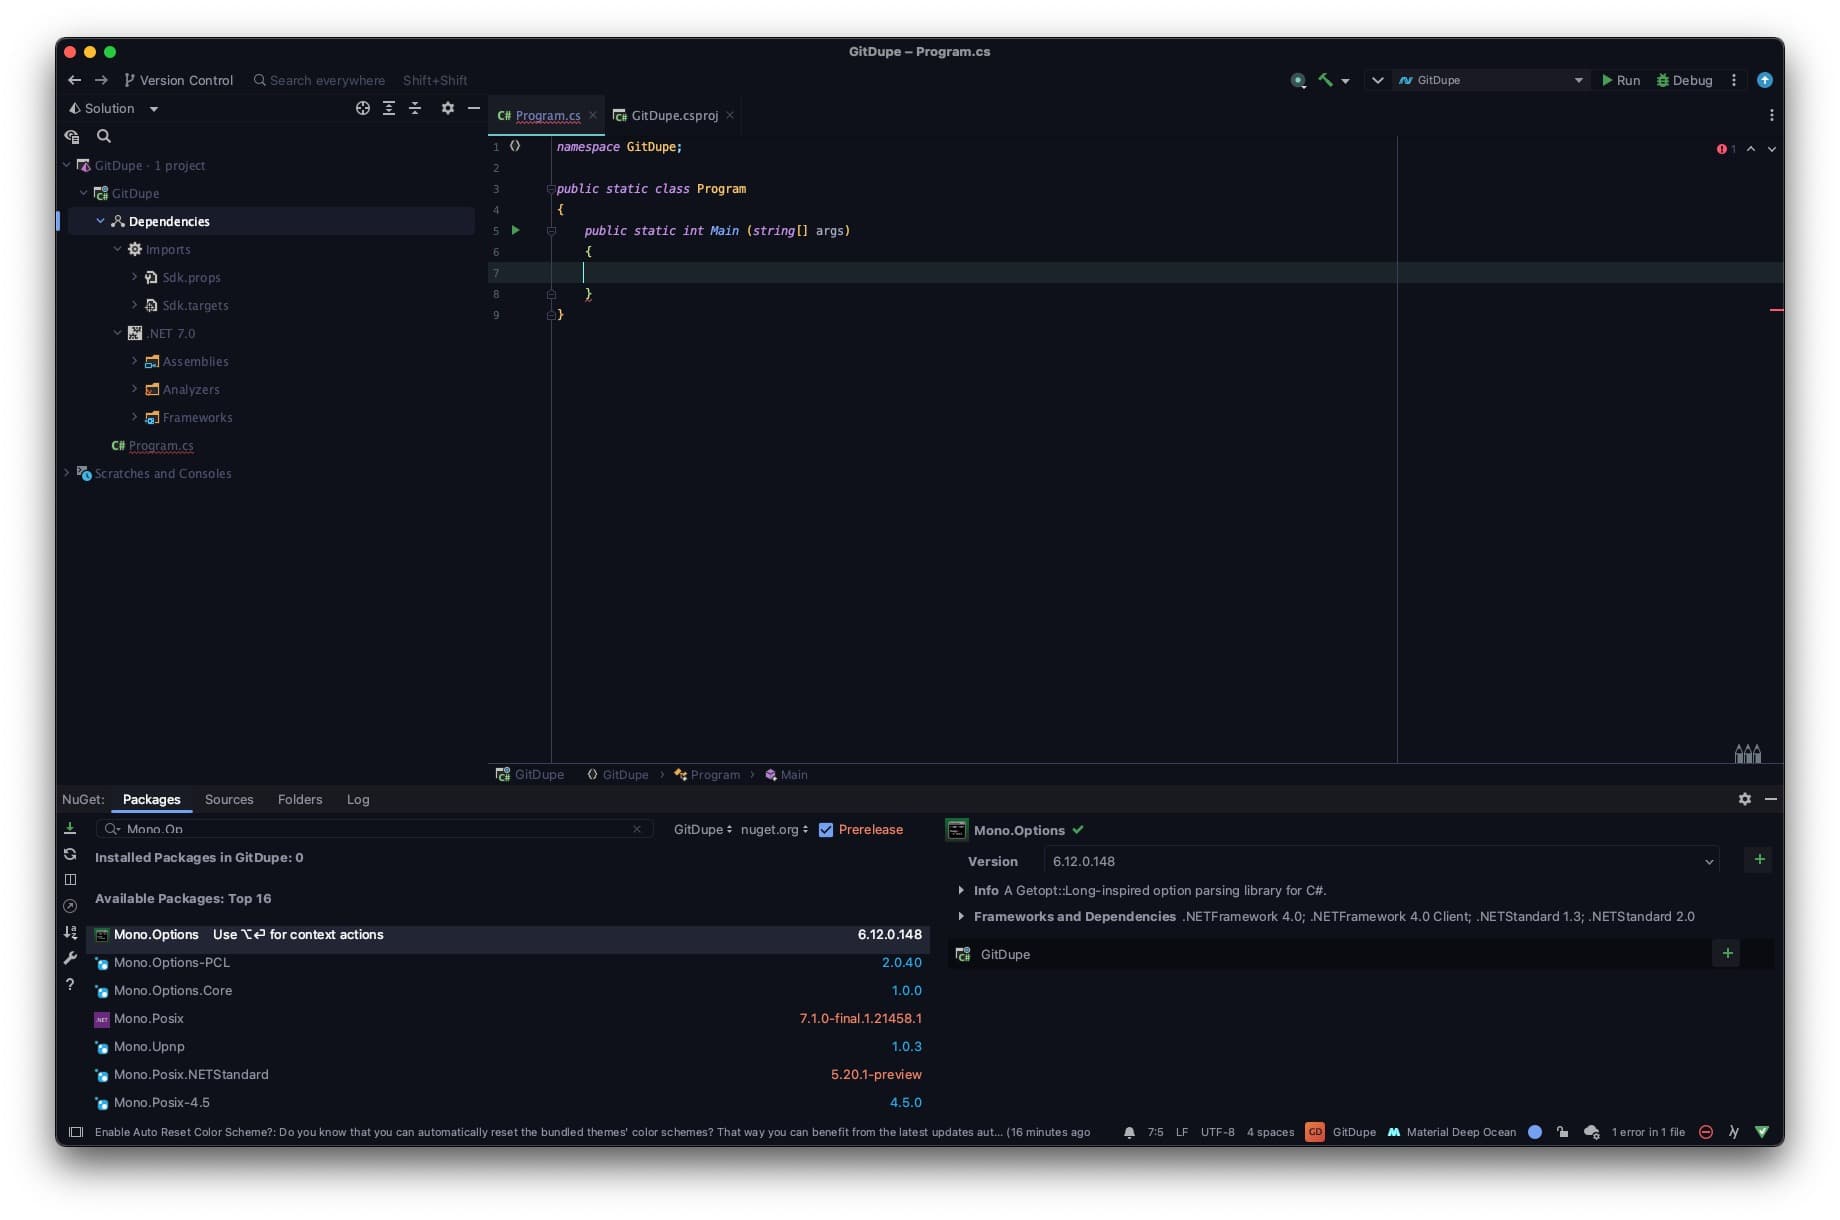
Now, the package should be visible under dependencies.
Establishing a command
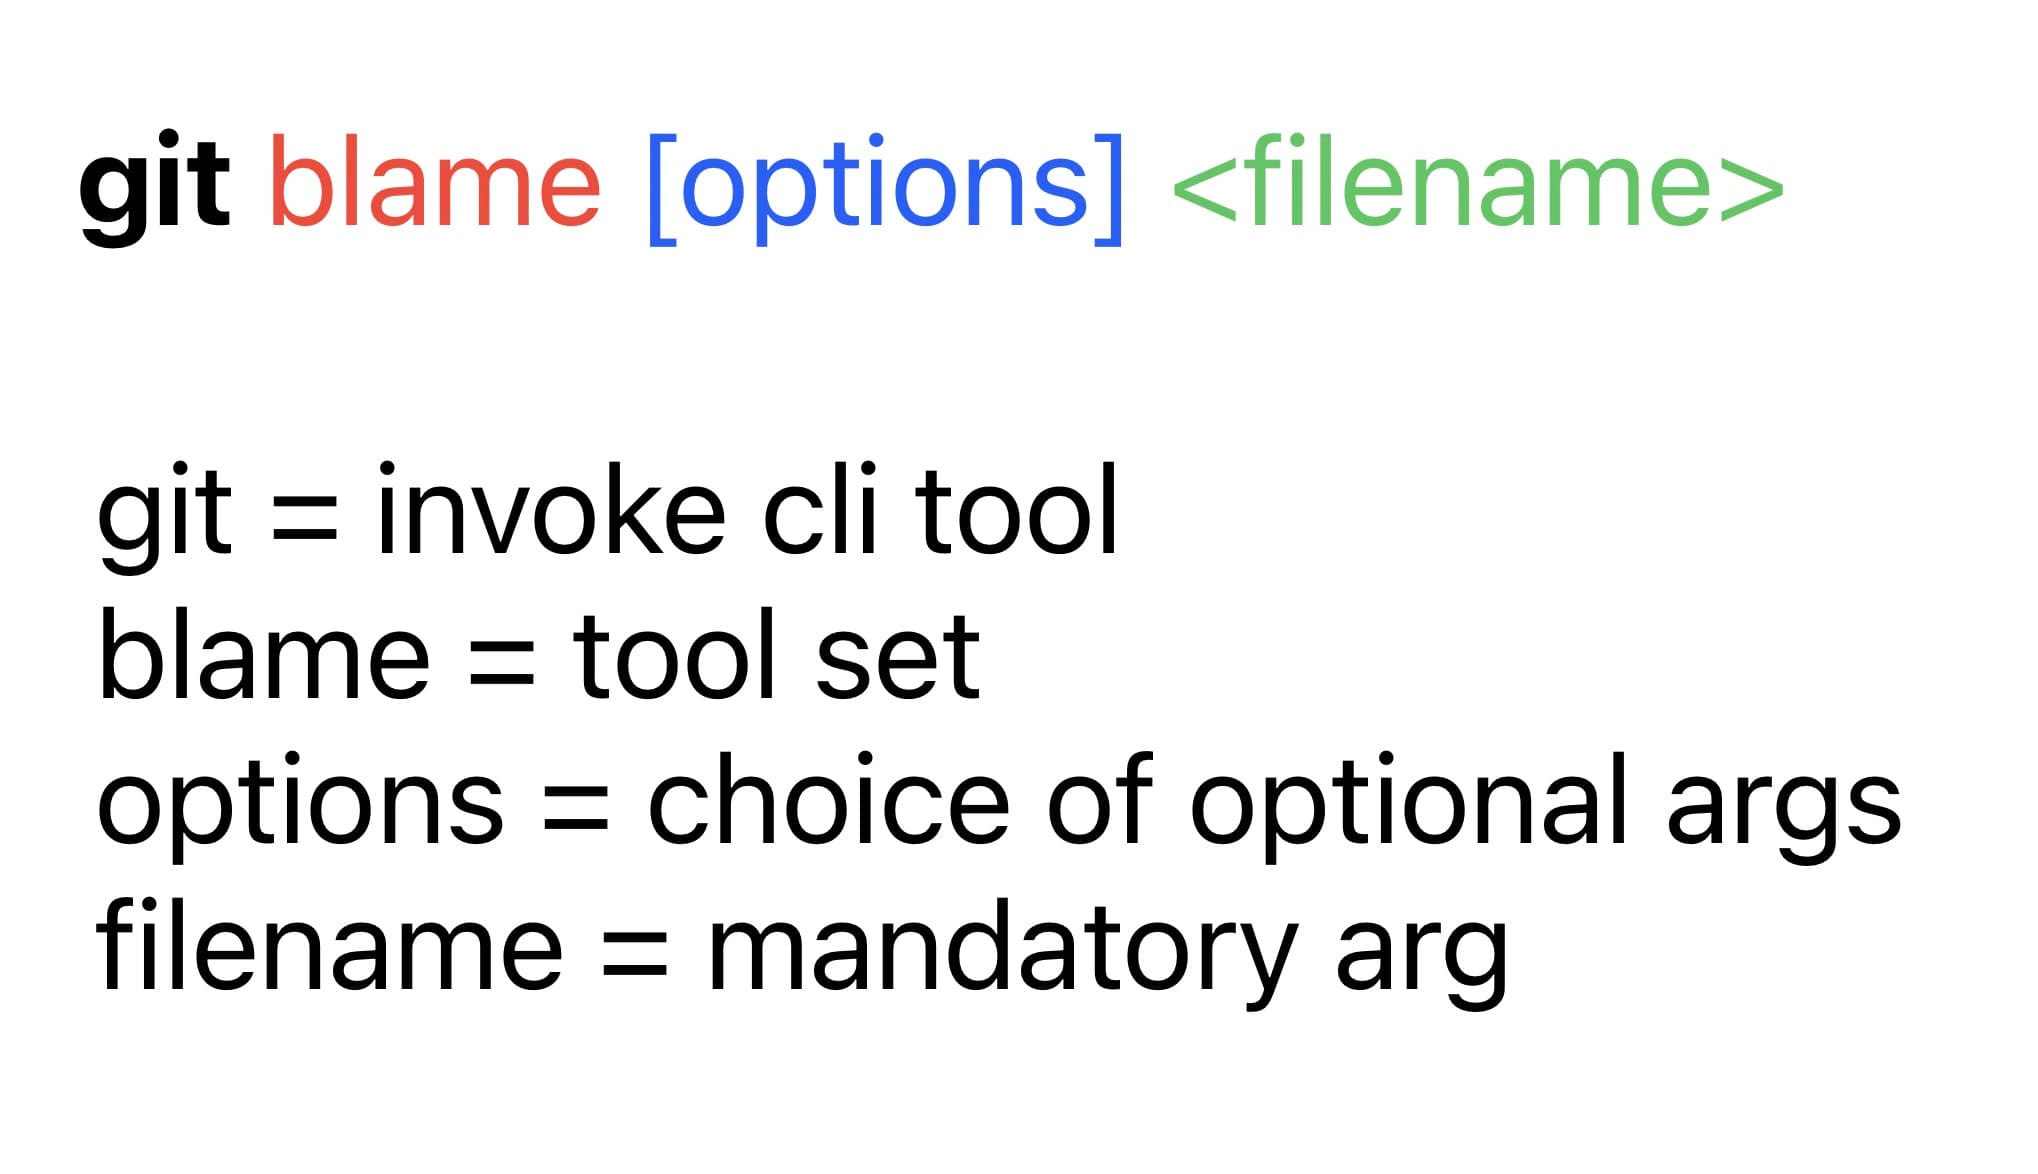
Going back to Program.cs, we are going to establish the command set for our tool, starting with our first command: git blame.

Official git documentation for git blame (opens in a new tab)
Since we are already within the git “environment” perse in our application, there’s no need to repeat git at the beginning of each command invoked. So a command that would typically look like this: git blame Program.cs → would now be invoked like this → blame Program.cs within the app.
We are going to create a new directory called “Commands”, within which all the support and implementation for the tool’s commands will be housed.
Create a GitCommand.cs file and reference the Command class as a base. The GitCommand class will serve as the base for the tool’s commands. As for the constructor, based on the source code (opens in a new tab) this is the Command’s default constructor which we will implement, but we can also implement an override to abstract away unnecessary detail where it’s not necessary for the user to explicitly identify if help is necessary or not and will use the previously defined constructor as a base. This is just an example of many where you can customize Mono.options to fit your app’s needs with minimal effort.
And then referring back to the docs, we need to implement the Invoke method as well. For now, I’m using the source code as a placeholder but once we have a bit more structure to the program we can always come back and modify the invoke implementation to reflect the actual behavior of the command.
There can be single or multiple commands nested within the same command set but the command set will be the parent and the commands nested are the children, so the command invoked will reflect this structure. To start we will keep things simple, blame will be it’s own command set and have 1 command available. Check out this post (opens in a new tab) to learn how to implement nested commands.
Ok cool, so now we have a solid base class that we can refer to for future commands. Now let’s build our blame command. We are going to create a class: BlameCommand.cs within the Commands directory. This will now use the GitCommand class as a base and add a constructor/Invoke implementation.
Now going back to Program.cs, we are going to add our blame command to the command set.
And we can call the run method (opens in a new tab) on the command set to set the program in action based on the arguments passed and if the checks in place are met then the command’s behavior will be invoked.
Now if you were to run your program with blame as an argument it should be successful in running it and exiting with a status of 0.
Establishing arguments
Ok, blame command…check. But what’s a command without some options? For each corresponding command, we are going to define the expected arguments (options).
By integrating Options into our codebase like this:


Our CLI tool will have the following functionality:

when a command like
blame --h is passed to our tool.
Similar to how we established a base class for the command earlier, we are going to do the same for the arguments. Note: establishing such base classes isn’t “necessary” really but just a good programming practice and makes maintaining the application so much better.
We are going to create a file called BlameCommandArguments.cs and this will house all of the possible arguments that can be passed to the git blame command. For starters we will start with just the one that is required- the file name. In the file, we will add the argument as a property and in the BlameCommand.cs file we will reference the property and set the value if passed.
Mono.Options has this neat thing called OptionSet (opens in a new tab) and you can easily define and set option values for a command. In BlameCommand.cs we are going to define an option set and establish the options based on git’s documentation. Starting with the mandatory argument- the file name.
Now we are going to pivot and focus on the arguments side of things. Similar to how we established a base class and system of inheritance for the command we are going to implement a similar practice to the arguments for the commands.
Create a file Commands/GitCommandArguments.cs. This class will serve as the template for the argument specifications per command implemented. For now, just get the file established and we will come back to it.
Now, create a file BlameCommandSet/BlameCommandArguments.cs. This class will use the GitCommandArguments class as a base. This class takes care of the establishing and handling of all arguments. Now back in the BlameCommand.cs class, add the filename as an option to the option set.
At this point, we are taking all the different pieces and piecing them together. By doing this, we are setting the foundation for the user to be able to pass in the following command:
blame --filename=”[file of interest]”
The flow of the program thus far is that our program begins in Program.cs when we pass in the command as arguments to the main method. Program.cs/Main > command objects created > the command set is run with the arguments passed
Adding help
Ok going back to the option set, we are going to refine the structure to make it more helpful to the user. In case our user needs help, this information should easily be available and we can include this capability in the option set. Go to GitCommand.cs, and add a “ShowHelp” variable In the Invoke method, we will check the value of “ShowHelp” If true, use the Options.WriteOptionDescriptions method to write to the console In BlameCommand.cs, add the ShowHelp functionality into the option set.
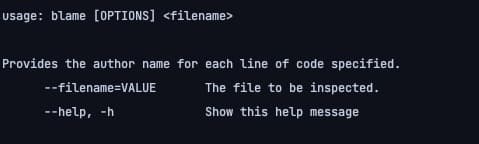
So, now a command like:
blame --h can be passed for the user to get help insights (and the output will be as displayed in the image above).
Next Steps..
As far as the usage of Mono.Options goes, we’ve explored a few cases: establishing a command, adding arguments, and adding help. Right now the console application has a solid foundation: a user can pass a filename to the command and get help. The next steps in improving this application consist of:
- implementing other optional arguments
- argument validation
- logging
- using Tasks with exit codes to indicate if an action was successful or not rather than using arbitrary status numbers
Keep the fun going and check out the rest of the posts in this series:
- Part 2/3: Nested commands with Mono.Options (opens in a new tab)
- Part 3/3: Refine the CLI tool (coming soon)